Tuesdays With Dorie: Black and White Banana Loaf

This weeks Tuesdays With Dorie recipe, Black and White Banana Loaf (pg. 232) was selected by A Year in the Kitchen. For the full recipe click over to Ashlee’s site or buy the phenomenal cookbook, Baking From My Home To Yoursby Dorie Greenspan.

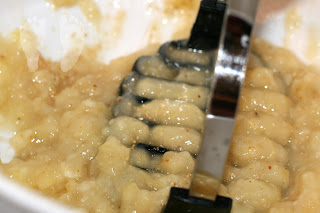
The first step was to measure out the dry ingredients and mash the bananas. Yum… mashed bananas. Looks like Bo food!

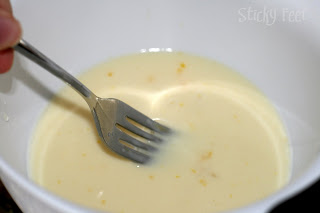
As I was adding ingredients I had to make several substitutions. I made this in the evening after Bo was in bed and I wasn’t willing to go to the store! Instead of ginger I used pumpkin pie spice and instead of whole milk I used 1/4 cup heavy whipping cream and 1/2 cup skim milk. That equals a 1/2 cup of whole milk, right? 🙂

Next, I creamed the butter, added eggs, vanilla, white and brown sugar, and the other dry ingredients to make a nice batter.

Here is the batter after I folded in the mashed banana.

I separated a little under half of the batter and added chocolate and butter. I had to make another substitution here as I didn’t have any bittersweet chocolate. I used unsweetened instead an added another 1/4 cup of brown sugar to the batter to try to make up for the sweetness — I don’t think that worked to well….

Instead of marbling I poured the chocolate in the bottom of the muffin pan and added the regular batter on top.

It was a beautiful loaf — a little flatter than I would have liked but pretty. I wasn’t a fan of the chocolate flavor mixed with the banana. Maybe if I’d had the right chocolate on hand! I’m anxious to see what everyone else thought! Pop over and see the rest of the loaves at Tuesdays With Dorie!

Tuesdays With Dorie: Chocolate Pudding Tarts

This week’s Tuesdays With Dorie recipe was selected by It’s Melissa’s Kitchen. You can find the full recipe by clicking over to Melissa’s blog or in the fabulous cookbook Baking: From My Home To Yours by Dorie Greenspan on pg. 383.

The recipe is for a rich, creamy, velvety chocolate pudding that is prepared in a food processor. I wanted a fun twist so I decided to make tarts and used cookie dough as my tart base.

I took a muffin tin, flipped it over and sprayed it generously with cooking spray. I then put rounds of dough on top of each muffin tin.

I baked the tarts for about 11 minutes in a 350 degree oven. While they were baking I tackled Dorie’s chocolate pudding. It was a simple recipe to follow.

I used both my big and my little Cuisinart while making this recipe. The baby Cuisinart blending the dry ingredients while the mama Cuisinart blended the wet ingredients. Don’t they look cute side by side?

Here are the eggs and a little bit of sugar preparing to go for a whirl.

I only used 4 oz of bittersweet chocolate instead of the 5 oz the recipe calls for. I didn’t realize the bar I purchased was only 4 oz until I was home and in the process of making the recipe. Bo was taking a nap so there was no chance of a quick run to the store. I figured it would be just as good with only 4 oz and I found it to still be quite rich and chocolaty.
I was amazed at the frothiness of the pudding. I think this may be part of the secret that makes it so yummy.

It was a fast recipe to prepare and before I knew it my tarts were out and the pudding was ready. I spooned the pudding into my cookie tarts and behold — Chocolate Pudding Tarts!

They were delicious and even received a rave review from Mike, who isn’t a fan of pudding!

Tuesdays with Dorie: Apple Cheddar Scones

**Please vote in the poll on the left sidebar!!**

This week’s Tuesdays with Dorie recipe was Apple Cheddar Scones from pg. 32 of Baking: From My Home To Yours by Dorie Greenspan. This weeks recipe was selected by Karina at The Floured Apron. (You can find the full recipe by clicking the link or by purchasing the cookbook which is currently on sale at Amazon.)

I have to admit, I wasn’t thrilled that this was the recipe selected. It seems like a fall recipe to me — with cold apple cider being one of the key ingredients.

On Thursday evening, I made these as part of our dinner. The first step was to mix the liquid ingredients together. I couldn’t find apple cider anywhere so I substituted with apple juice. I also had to buy a ginormous carton of buttermilk for these so if you have any good recipes that take buttermilk I’d love to hear about them.

After I mixed the wet ingredients in one bowl I mixed the dry ingredients in a separate bowl. One of these ingredients was cornmeal, which really made the scones in my opinion. The cornmeal gave the finished scone a lot of texture and flavor.
Probably because I live in the middle of bo-funk nowhere, I couldn’t find dried apples. Except for the little Gerber ones for babies. So instead I used fresh apple. Honestly, I think it was probably better with the fresh apple than it would have been with dried.
I combined the wet and dry ingredients and used my whisk as a pastry blender to make the dough. Then I folded in the apple and grated cheddar cheese.
I scooped the dough into individual mounds and put them on the parchment paper to bake.

And the end result was a very rustic, fall-looking and tasting, apple cheddar scone.

I really liked the scones. Mike wasn’t a big fan. He says he’s never liked scones. I think if I make them again (in the fall) and call them biscuits, he’ll lap it up. But this was not a part of our meal, it was just something I gave him to try after dinner. 🙁 My mom liked them though and so did I. They have a wonderful texture from the apple and cornmeal and were great cold the next morning for breakfast.

Tuesdays With Dorie: Blueberry Cobbler

This week’s Tuesday’s with Dorie recipe was Mixed Berry Cobbler from pages 416-417 of Baking: From My Home to Yours by Dorie Greenspan. This week’s recipe was chosen by Beth of Our Sweet Life.

I decided to tweak the recipe this week. Instead of mixed berry, I decided to make plain blueberry. I also made individual mini-cobblers instead of one big cobbler. It worked out well!!

The reason I wanted to make plain blueberry instead of mixed berry is that several years ago, Mike and I went out to dinner Mill Race Inn and he had his first cobbler. Mike has texture issues with food so he wasn’t sure if it was something he would like — but he loved it!! He says that he’s never found a cobbler as good as that one so I thought I would try to replicate it. While this cobbler was good it didn’t receive the rave reviews like the first
one…

I started off by putting all of the dry ingredients for the dough into a large mixing bowl. Then I chopped up the butter.

Just like Dorie said, I used my fingers to mix the butter into the dry ingredients. It was actually kinda fun.
Bo thought it was pretty fun too. Mike and I were both in the kitchen cooking. Mike was baking cookies and took some of the pictures for this post (special thanks to my guest photographer!). Bo sat in his highchair and was entertained by our antics. At least he finds us amusing…
After a cute Bo break, I added the cream to form the dough and mixed it with a fork.
I then rolled out the dough. I used a biscuit cutter to cut circles for the top of all eight of my mini-cobblers.
Then I mixed up the fruit mixture. These are my berries coated with sugar, lemon zest, and cornstarch.

I spooned the berries into ramekins. There were just enough to make the 8 servings.
Then I topped each with a circle of the cobbler dough.
I cut crosses in the top of each but they didn’t really need them. The sides gave them plenty of room to breathe and vent.
Then I popped the tray in the oven.
I baked them for only 50 minutes instead of the longer time for the full cobbler. When they came out they were warm and bubbly.

We had them for supper on Sunday evening. We fixed a nice dinner and invited my mom over to eat. We ate out on the porch — one of my favorite parts of nice weather!
When we were ready for dessert I had to go in to get the ice cream. I enjoy my cobbler warm with vanilla ice cream on top.
Here I am, scooping up my first bite!
And here goes that bite into my waiting mouth.
And then my ramekin was empty.
I think I liked it!

French Chocolate Brownies

Because apparently, I don’t think I have enough to do, I decided to join a baking club. (Yes, I’m 26. Yes, I joined an online baking club… Just call me a nerd, it would be easier.)

I joined Tuesdays with Dorie after drooling over the recipes on several of my favorite foodie websites. Last week, my copy of the book arrived and this week was my first chance to make one of Dorie’s special recipes.
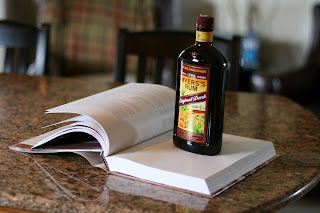
The first step in making these brownies was to send Mike out for a bottle of dark rum. This is the smallest and cheapest bottle he could find to supply the 1 1/2 tablespoons needed for the recipe. At least it makes a good page holder. 🙂
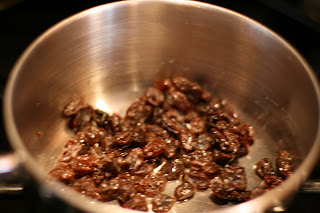
I put the raisins in the pan, added the water, and let them cook.

Meanwhile, I took a shortcut and melted the chocolate and butter in the microwave instead of on the stove. It worked just as well.
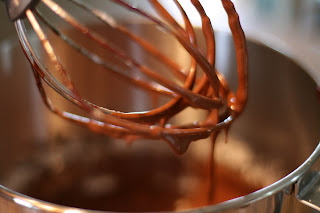
I beat the egg and sugar together and then added the chocolate mixture. Yummm….
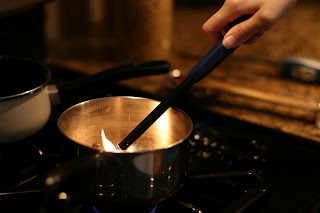
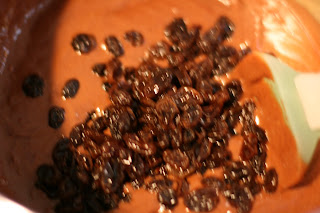
Finally, it was time to add the rum. I added the rum to the raisins and prepared for a big burst of flame.
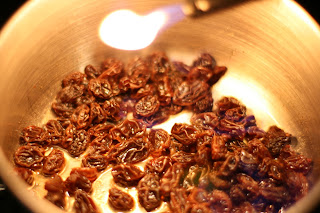
Unfortunately, all I saw were a few little blue patches in my raisins. After I folded in the dry ingredients, I added the raisins. If I make these brownies again, I’ll be leaving the raisins out. There is a weird texture issue with raisins in brownies…
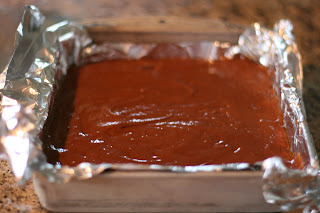
Here are the brownies, ready to go in the oven.
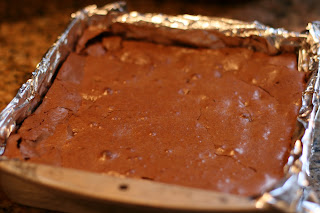
Here they are, fresh out of the oven.
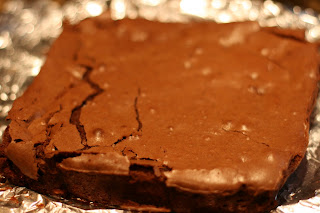
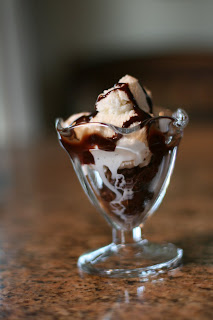
And here is the large brownie, ready to be cut and made into yummy brownie sundaes!

Overall, it was a successful first attempt — they aren’t the prettiest food I’ve ever made — or the best (raisins in brownies is just odd to me) but it was a fun experiment. I’m hoping that Tuesdays with Dorie will force me outside of my comfort level a bit and I’ll learn a few tricks along the way.

Interested in trying these brownies yourself? The full recipe is below!

French Chocolate Brownies


– makes 16 brownies -Adapted from Baking From My Home to Yours.


Ingredients

1/2 cup all-purpose flour

1/8 teaspoon salt

1/8 teaspoon cinnamon (optional)

1/3 cup raisins, dark or golden

1 1/2 tablespoons water

1 1/2 tablespoons dark rum

6 ounces bittersweet chocolate, finely chopped

1 1/2 sticks (12 tablespoons; 6 ounces) unsalted butter, at room temperature and cut into 12 pieces

3 large eggs, at room temperature

1 cup sugar

Getting ready: Center a rack in the oven and preheat the oven to 300°F.

Line an 8-inch square baking pan with foil, butter the foil, place the pan on a baking sheet, and set aside.

Whisk together the flour, salt and cinnamon, if you’re using it.

Put the raisins in a small saucepan with the water, bring to a boil over medium heat and cook until the water almost evaporates. Add the rum, let it warm for about 30 seconds, turn off the heat, stand back and ignite the rum. Allow the flames to die down, and set the raisins aside until needed.

Put the chocolate in a heatproof bowl and set the bowl over a saucepan of simmering water. Slowly and gently melt the chocolate, stirring occasionally. Remove the bowl from the saucepan and add the butter, stirring so that it melts. It’s important that the chocolate and butter not get very hot. However, if the butter is not melting, you can put the bowl back over the still-hot water for a minute. If you’ve got a couple of little bits of unmelted butter, leave them—it’s better to have a few bits than to overheat the whole. Set the chocolate aside for the moment.

Working with a stand mixer with the whisk attachment, or with a hand mixer in a large bowl, beat the eggs and sugar until they are thick and pale, about 2 minutes. Lower the mixer speed and pour in the chocolate-butter, mixing only until it is incorporated—you’ll have a thick, creamy batter. Add the dry ingredients and mix at low speed for about 30 seconds—the dry ingredients won’t be completely incorporated and that’s fine. Finish folding in the dry ingredients by hand with a rubber spatula, then fold in the raisins along with any liquid remaining in the pan.

Scrape the batter into the pan and bake 50 to 60 minutes, or until the top is dry and crackled and a knife inserted into the center of the cake comes out clean. Transfer the pan to a rack and allow the brownies to cool to warm or room temperature.

Carefully lift the brownies out of the pan, using the foil edges as handles, and transfer to a cutting board. With a long-bladed knife, cut the brownies into 16 squares, each roughly 2 inches on a side, taking care not to cut through the foil.

Serving: The brownies are good just warm or at room temperature; they’re even fine cold. I like these with a little something on top or alongside—good go-alongs are whipped crème fraiche or whipped cream, ice cream or chocolate sauce or even all three!

Storing: Wrapped well, these can be kept at room temperature for up to 3 days or frozen for up to 2 months.

Homemade Baby Food: Part Deux

Is that beets or did my baby turn into a vampire?
Despite the smile, Bo isn’t a big fan of beets!

Recently, Leslie left a comment asking about how the frozen avocado turned out and if it had a brown layer. To answer her question, no, my avocado did not have a brown layer but it was mixed with breastmilk. I am not sure if that makes any difference or not? I pureed it in the Cuisinart, added breastmilk and froze it in “Bo pellets” immediately. It’s one of Bo’s favorite foods!

Currently, Bo is eating quite the variety of foods. He still has cereal for one meal a day (usually with a fruit) and he is eating a large variety of fruits and vegetables for the other meal. So far I have made: avocado, carrots, sweet potato, pears, peaches, beets, squash, peas, green beans, broccoli, papaya, mango, and banana. (Suggestions for new foods are always appreciated!)
This weekend I hope to make two new foods – plums and apricots. Unfortunately, we will have to make a produce run first. Wal-Mart doesn’t exactly have a wide variety of organic fresh produce!!
Overall, making and freezing the food is quite easy. It takes a little time but I usually do it while I am making dinner so it isn’t like I am cooking at a different time — I am in the kitchen anyway. I usually make about 30-35 servings of an ingredient at a time and that lasts quite awhile!
The beets were the most difficult to make because they had to be boiled for two hours and then there was red juice everywhere! Ugh! They smelled kinda weird too!

Bo is not a big fan of broccoli, green beans, or beets. I thought maybe it was a problem with the homemade green beans (they aren’t totally smooth) and invested in some organic green bean babyfood but he wouldn’t eat that either. So far the green beans is the only pre-made babyfood he has tried and he didn’t like it — but I think he just doesn’t like green beans yet. Go figure! I’ve also given him jarred organic applesauce. Everything else, I’ve made at home.
To get him use to foods like green beans I’ve been mixing them with other foods that he really likes. For example I may give him 2 pellets of sweet potato and mix it with 1 pellet of green beans. This method must mask the green beans enough because he will eat it — no problem. I hope to slowly cut down the amount of the sweet potato so that one day he will eat just the plain green beans!

Many people commented on the last post I wrote about this topic that they didn’t make their own food because it required too much time. Honestly, if you cook anyway, I think you would only have to add about 30 minutes a week to make your own babyfood. And with the $$ saved, it is well worth it to me. I know it’s not for everyone, but I’m enjoying making it for Bo.

All of the hours spent researching high chairs paid off. Our high chair with a red cushion has worked out perfectly. It looks nice and works well. In my opinion, it was well worth it! I’m excited to see how well it transitions as he continues to grow. I guess I can say that I’m spending the money I’m saving on the babyfood on the chair but I’ve been so happy with it!!

Even better, Reagan likes it too…

Chocolate Mousse Cupcakes

Around Christmas time, Christina at Apron Strings posted about the many great cupcakes she was making from Cupcakes Galore. I bought myself the cookbook for Christmas and I’ve been enjoying many of the recipes.

Recently, I’ve been reading more and more food blogs. I really enjoy cooking, cookbooks, cooking shows (Top Chef), cooking magazines (Taste of Home, Everyday with Rachel Ray, Cuisine at Home) and, of course, eating. I’m finding myself spending many naptimes in the kitchen!

Inspired by Smitten Kitchen, Barefoot Kitchen Witch, and Greenlite Bites I thought I would do my own post for how to make one of the cupcake recipes in Cupcakes Galore (my recipe is very slightly altered). Plus, it gives me a new object to photograph — while I love taking pictures of Bo, sometimes it’s fun to photograph something that doesn’t move! I took pictures of the entire cupcake making process.

I made these cupcakes on Saturday. My in-laws were in town and they seemed like they would be a yummy dessert for all of us to enjoy after dinner.

Ingredients:
4 heaping Tbsp. flour
2 1/2 tsp. baking powder
1/2 tsp. salt
12 ounces dark chocolate
2 sticks unsalted butter
6 eggs, separated
1 cup sugar

Preheat oven to 350. Mix flour, baking powder and salt together and set aside. Melt the chocolate (10 oz) and butter in the microwave.

Stir and set aside. Beat egg yolks and sugar until light yellow and foamy. Beat in the melted chocolate until totally blended.
Beat egg whites with a pinch of salt until stiff but not dry. Gently fold into chocolate mixture. Divide mixture into two parts (1/4 and 3/4) and put the smaller portion in the refrigerator to be used later to frost cupcakes. Gently whisk flour mixture into the larger portion until it is completely absorbed.
Fill cupcake papers about 2/3 full with batter and bake for 15 minutes. Do not overcook. Cupcakes should be just cooked and moist in the center. Remove from the oven and cool. When cupcakes are cool, frost with the remaining chocolate mousse.
Grate the remaining 2 oz. of chocolate. Decorate and enjoy!

Homemade Baby Food

The last few weeks have been filled with research on high chairs, making baby food, and what to feed our little guy. Of course, much of my research is conflicting…

The books that I’ve read include Super Baby Food, Superfoods, and Top 100 Baby Purees, not to mention all of the other childcare books that have feeding hints and tips in them as well — as it seems every ‘childcare expert’ has an opinion. I’ve read many of them, numerous blogs, several online articles, and a plethora of websites.

All my research has helpful hints and tips but a few authors are a tad overzealous. I’m all for a healthy, happy, well-nourished baby but just the thought of feeding my child a few of the Super Baby Food‘s makes me sick. Like brewer’s yeast – YUCK! (But I did like the book for it’s information about first foods, the quick reference for foods in the back, and the preparation and freezing techniques.)

You’re probably starting to think that I’m a bit overzealous about baby food… And I guess in a way, I am. I want Bo to eat healthy, mostly organic food. I want him to have the best chance to be healthy and smart. I want him to have a healthy relationship with food. I don’t want to be one of those mom’s who never gives their kids sweets — but I also don’t want him to think that donuts are a breakfast staple… And we definitely won’t be joining the ‘clean plate club’ around here. Therefore, I figure it is best to start young and build from there.

We decided to start rice cereal at the 4 month mark. We are using Earth’s Best Whole Grain Organic Rice Cereal. We did only plain rice cereal at the dinner time feeding for about a week and a half. Then we added the breakfast feeding with banana. I am meeting in the middle and trying each new food for 5 days before moving to the next food.

Bo’s feedings look like this right now:

At some point during the night – breastfeed (this morning this wasn’t until 6:15!! woohoo!!)
8 am – breastfeed and cereal and banana (1 side, rice cereal and banana, other side)
11 am – breastfeed (expressed milk on work days)
2 pm – breastfeed (sometimes expressed milk — depending on how late I work — good thing I’m a master pumper!!)
5 pm – breastfeed and avocado (1 side, avocado, other side)
8 pm – large bottle of expressed milk (usually 9-10 oz.)

I plan to wait another week or two before adding in a solid food feeding at lunchtime. I want to space out the introduction of each meal but we also have to wait until our highchair* arrives so that we can take the travel seat to Mom’s house for the lunch feedings she will take care of during the week. Once all three solid feedings are established then I will start lengthening out his schedule. First to 3 1/2 hours and then to 4 hours. Right now our 3 hour schedule is working so well though that I am afraid to change it!!

This weekend I tackled my first attempts at making homemade baby food. I made avocado, sweet potato, and carrots. So far it is really easy and appears to be cost-effective. I made over 50 servings of homemade, organic, sweet potato, carrot, and avocado for around $5.

Here are some pictures of my baby food manufacturing.


*We didn’t want a big plastic highchair. We spend a lot of time in the area where the highchair will be and we wanted something that will look nice and be functional. After much research we decided on this high chair. Even though it was more than we had hoped to spend we have high hopes for it. I’ll do a review after Bo tries it out to let you know if it is really worth it.