Chickpea Cucumber Salad

Chickpea and Cucumber Salad

In late February, Mike and I tried Blue Apron meals for a few weeks.  We really enjoyed them and ended up trying many new foods as result.  It was a fun experiment and I think we will probably do a few more weeks again in the future.

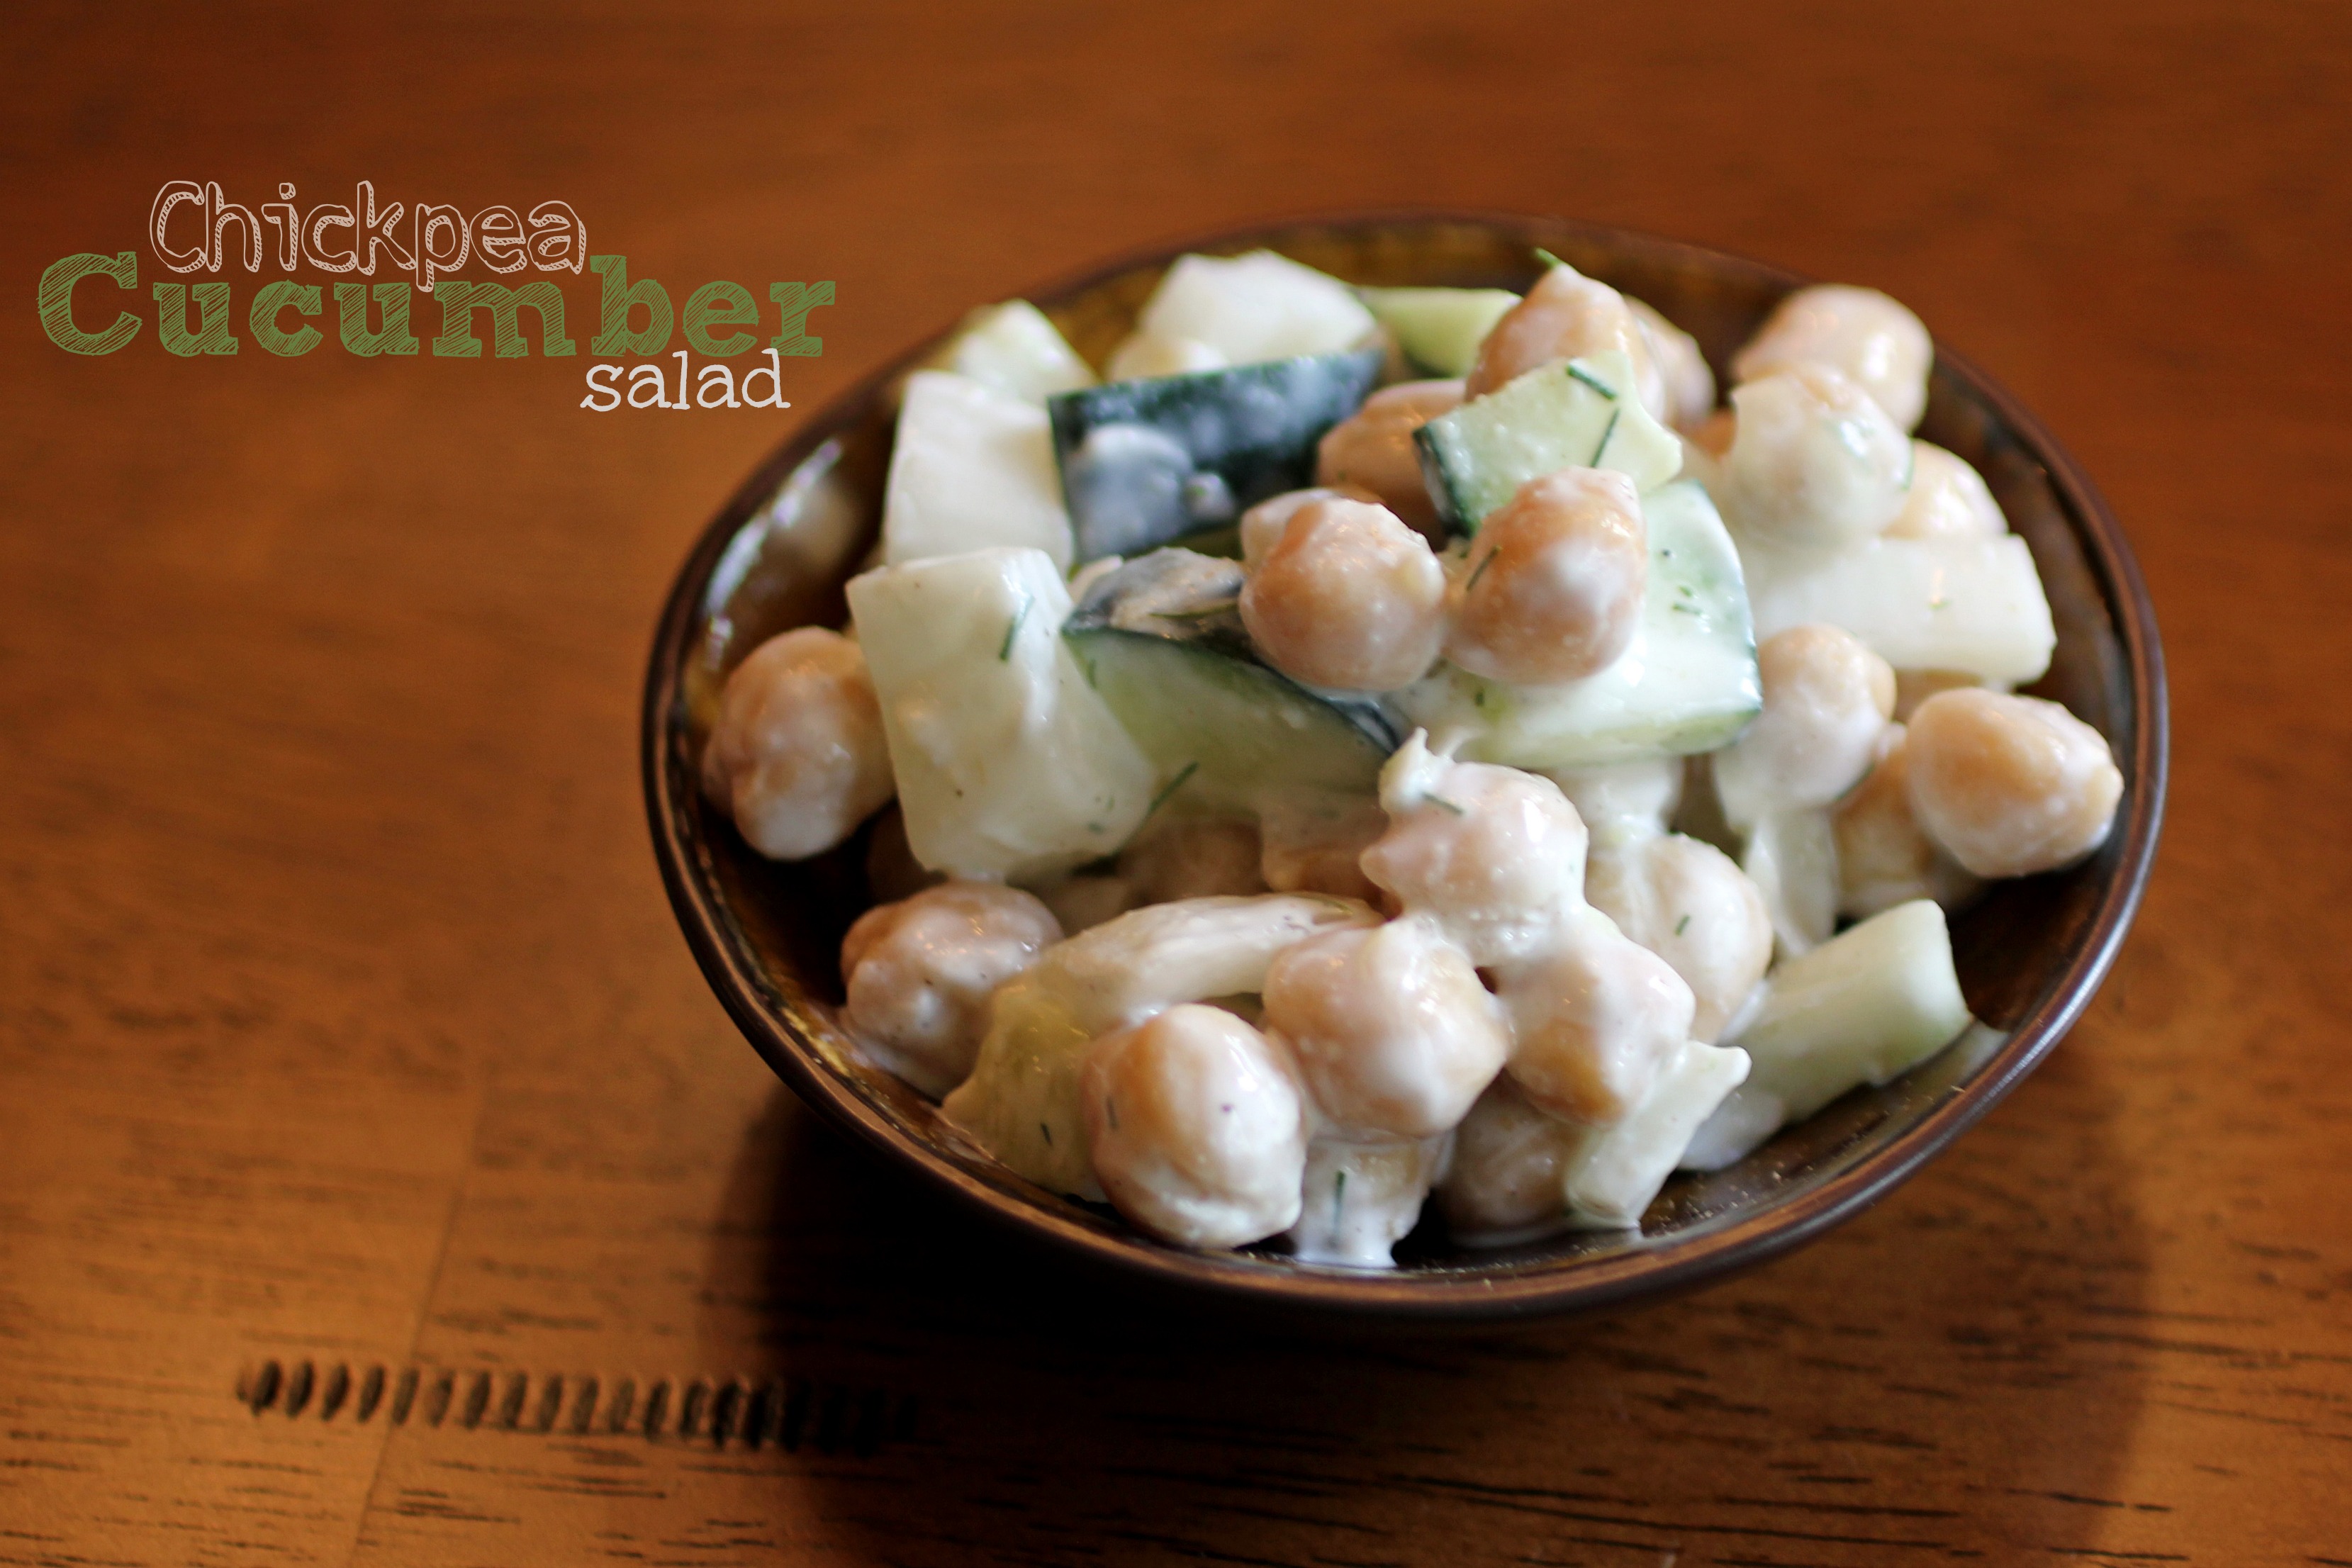
One of the recipes we tried was a chickpea and cucumber salad.  It was paired with salmon and I ate the leftover salad for lunch the next day.  Since then, I haven’t been able to get the salad out of my head — so I made my own last night, with a few modifications. This recipe is loosely based on that meal.  Even Mike ate it — and these are mostly ingredients he won’t typically eat.

This salad makes a great side dish for fish or poultry.  It’s also a great lunch dish or a side to take to a cookout or potluck.  It seems perfect for the season as everything is finally turning green in our area after a very long, snowy winter.  This salad tastes like Spring!

Chickpea Cucumber Salad
Author: 
Prep time: 
Total time: 
Serves: 4-6
 
Ingredients
  • 3 Tbsp. lemon juice
  • ⅓ cup soft, crumbly goat cheese
  • ¼ tsp. garlic salt
  • ¼ tsp. black pepper
  • 1 can chickpeas, rinsed and drained
  • 1 cucumber, chopped
  • ¼ of a red onion, chopped
  • 2 tsp. dill weed, minced,
Instructions
  1. In a small bowl, combine the lemon juice, goat cheese, garlic salt, and pepper. Stir to combine into a dressing-like texture. Set aside. In a larger bowl, combine the chickpeas, cucumber, red onion, and dill weed. Mix well and add dressing -- stirring to coat. Serve immediately or refrigerate.


Homemade Breadsticks

Breadsticks

Dislocated Olneans — this post is for you.  Growing up in Olney, Illinois, one of my most favorite places to eat is Joe’s Pizza.  The number of memories I have of eating Joe’s Pizza is a bit ridiculous — extra cheese, extra sauce pizza on Jenna’s 16th Birthday, countless orders of breadsticks with Mandy, and Sunday night pizza night at home. Joe’s Pizza is an Olney staple and one of the places that requires a visit each time I return to my hometown.

Now that I live in North-Central Illinois, I’m still shocked that the pizza places here don’t have breadsticks.  The “thing” in the Illinois Valley is garlic nuggets — which are okay — but I still crave and miss the traditional breadsticks from Joe’s.  Amazingly, I’ve figured out how to make them at home — and they are delicious.  Easy to make and oh, so good.  Now if I can just figure out Joe’s pizza sauce…
These breadsticks are great served with pizza sauce and cheddar cheese sauce (mixed together — it sounds odd, but trust me) for dipping.

I made these breadsticks twice this week.  The kids had friends over on Tuesday so I made a batch to have with our spaghetti dinner — and then I made them again last night — just to be able to eat more of them!  So much for that low-carb diet…  Last night, Bo came into the kitchen when they were almost done baking and exclaimed, “What is that amazing smell!?!”  (Yes, he’s 6…) These breadsticks were a huge hit with the trio.

Homemade Breadsticks
Author: 
Prep time: 
Cook time: 
Total time: 
Serves: 6
 
Ingredients
  • 1 cup warm water
  • ¼ cup canola oil
  • 3 cups white flour
  • 1 tsp. salt
  • 3 Tbsp. brown sugar
  • 2½ tsp. dry active yeast
Instructions
  1. Using a bread machine, combine all ingredients in the order listed. Turn the machine on the dough cycle setting. When the dough cycle is complete, roll out the dough and cut into 20ish slices and place on baking sheets lined with parchment. Let rise for at least an hour (I let mine rise for nearly 2 hours as it was pretty chilly in my kitchen).
  2. Bake at 375 degrees for 10-13 minutes until just beginning to brown. They are great plain or you can brush with a bit of butter for some extra flavor. Serve with pizza sauce and cheese sauce for dipping.
  3. *If you don't have a bread machine, I think you could use the dough hook on a mixer to make the dough -- just make sure you let the dough rise twice -- once before cutting into breadsticks and again after*


Taffy Apple Salad

I’m not one that typically enjoys random side dishes but this recipe works great as a tasty side for a cookout or potluck.  It’s also a great snack or dessert.  I originally found this recipe when I was doing Weight Watchers made with sugar free/fat free pudding and Cool Whip free.  However, this batch was fully leaded.

I thought my kids might like it but they weren’t even willing to try it.  Neither was Mike.  It’s a strange combination of ingredients but the flavor and taste is quite delicious.  It’s also pretty quick to throw together for a last minute gathering.

Taffy Apple Salad
Author: 
Prep time: 
Total time: 
Serves: 8
 
Ingredients
  • 4 green apples, chopped
  • 1 - 16 oz. can crushed pineapple
  • 1 small instant butterscotch pudding mix
  • 1 container Cool Whip
  • ¾ cup peanuts (optional)
Instructions
  1. In a blender, puree the crushed pineapple. Add the butterscotch pudding mix and whip until well combined. Fold in the Cool Whip. Add the chopped apples and fold in. Garnish with peanuts and chill before serving.


Oven Roasted Brussel Sprouts

This side dish is so easy to make I’m not even sure it warrants a recipe.  I don’t remember ever having brussel sprouts when I was little — it doesn’t seem like something my Grandpa would eat — but I discovered them last year and roasting them is actually very delicious.

I made these as a side dish for tortellini on Monday evening.  By the time Mike walked in, the trio was already sitting at the table, and loudly lamenting that they dislike brussel sprouts.  Mike, who barely touches a vegetable himself, told them they were good and tried one.  And actually ate it.  This, my friends, is legendary.  Sure, he doesn’t love them — but he ate one and commented, “They aren’t bitter like I remember them being as a kid.”  Baby steps.

Anna ate one.  Clara ate half a breadstick as her entire meal — and then ended up in the front room having a snack after her siblings were in bed because her belly hurt from not eating — and Bo — well, we won’t even talk about Bo.  Let’s just say he didn’t eat it.

Personally, I think these are delicious.  They are quick and easy to throw together for a side dish for anything from chicken to pasta.  And as the lone vegetable eater in the house, I’ll make them for myself since they require very little prep work.  If you like vegetables (unlike the rest of my family) then you’ll like these.  Promise.

Oven Roasted Brussel Sprouts
Author: 
Prep time: 
Cook time: 
Total time: 
Serves: 4
 
Ingredients
  • 10-12 brussel sprouts, cut into fourths
  • olive oil
  • black pepper
  • salt
Instructions
  1. Preheat oven to 350 and line a baking sheet with foil. Place cut brussel sprouts on the sheet and drizzle with olive oil. Season with pepper and salt to taste. Roast for 15-18 minutes.
  2. *** Also great sprinkled with a bit of Parmesan cheese ***


BLT Guacamole

Within the last year, Mike has discovered the beauty of guacamole.  Before, he wouldn’t touch the stuff, now he can’t seem to get enough.  During his Monday cooking spree last week, he attempted a version of Rick Bayless’ guacamole from the “Fiesta at Rick’s” cookbook.

Mike and I are huge Top Chef fans (we’ll be cruising with Top Chef stars in April!) and discovered Rick Bayless when he was on Top Chef Masters.  When we went to Chicago a few weeks before my 30th birthday we ate at Frontera Grill and I received Rick’s cookbook from Mike for my birthday.  It’s one of those books we’ve looked at longingly for awhile but now we’re finally venturing to try some of the recipes.  Especially since we both seem to want to eat Mexican food every day!

This guacamole is delicious.  It’s spicy with a bit of kick without being overpowering and the bacon adds a smokey goodness that elevates guacamole to a whole new level.  This recipe is a keeper — and one we’ll be making again and again!

We did have to venture to the Mexican market for the chipotle chiles en adobo, which are essential for this recipe.  For those of you that are even more rural than we are, I did find them on Amazon.  One can would make several batches of guac.

BLT Guacamole
Author: 
Prep time: 
Total time: 
Serves: 6
 
Ingredients
  • 5 strips thick cut bacon, cooked until crisp and crumbled
  • 3 large, ripe avocados
  • ½ medium white onion, finely chopped
  • 2 or 3 canned chipotle chiles en adobo, removed from canning sauce, stemmed, slit open, seeds removed and finely chopped
  • 1 large tomatoes cored and finely chopped
  • ½ cup chopped fresh cilantro
  • salt
  • 1 to 2 Tbsp. fresh lime juice
Instructions
  1. Scoop the flesh from the avocados into a large bowl. Using a potato masher or large fork, mash the avocados. Add the onion, chiles, tomatoes, cilantro, and about ⅔ of the bacon. Gently stir to combine. Taste and season with salt and lime juice.
  2. Use plastic wrap to cover the surface of the guacamole until ready to serve. Sprinkle with remaining bacon and a bit of cilantro and enjoy!


Italian Herb Bread

If you don’t have a bread machine but love fresh bread, you need to add one to your Christmas Wishlist.  Yes, it takes up a lot of room on my counter, but the smell of fresh baked bread with relatively little effort is completely worth it!

I received my bread machine for my birthday two years ago. At the time, I was still nursing my twin girls and didn’t have to worry about calorie or carb counting.  Now, I have to be a bit more aware of how much of this delicious bread I consume, but it’s still a staple recipe in our house.  I’ve made it dozens of times and it’s perfect to take with dinner to a friend post-surgery or to serve with spaghetti or lasagna on a chilly fall night.  Best of all, it’s quick and easy and requires relatively little prep, which is why it’s one of our favorites.

Italian Herb Bread
Author: 
Prep time: 
Cook time: 
Total time: 
Serves: 8
 
Ingredients
  • 1¼ cups warm water
  • 2½ Tbsp. oil
  • ¼ cup sugar
  • 2 tsp. salt
  • 4 cups bread flour
  • 2 Tbsp. dried Italian Seasoning
  • 2¼ tsp. yeast or 1½ tsp quick rise yeast
Instructions
  1. Pour all ingredients in machine in the order listed above. Set to the basic setting for a large loaf. We prefer light crust. Bread machines make this recipe extremely easy!

This recipe receives Five Wooden Spoons from my family as they all love it. Especially slathered with butter.

Crockpot Chicken Stock

I’ve spent the afternoon making dinner to take to one of my friends who just had her fourth child.  The primary ingredient in many of the dishes that I made (and will hopefully be sharing with you soon) is this amazingly easy, cheap, and delicious crockpot chicken stock.

Mike and I just discovered the wonders of making our own chicken stock about a year ago.  We make large batches and freeze it so we always have homemade chicken stock on hand.  I think the flavor is much deeper than the canned broth — plus it’s significantly cheaper too.  Especially for days like today when I need mass quantities!  Today I used over 10 cups of chicken stock!

The main ingredient in our stock is the carcass of a rotisserie chicken.  Every couple of weeks Mike will pick one up on his way home from work for an easy dinner.  The kids love it plain and we enjoy making wraps with the shredded meat.  Once we’ve picked it clean (or as clean as we want — we aren’t big fans of the dark meat) I throw it in the crockpot with ingredients that we always seem to have on hand and let it simmer away for a day or so before straining and freezing.  Homemade chicken stock is the base for many of my recipes.

5.0 from 1 reviews
Crockpot Chicken Stock
Author: 
Prep time: 
Cook time: 
Total time: 
Serves: 8
 
Ingredients
  • Rotisserie Chicken Carcass
  • 2-3 stalks celery, chopped
  • ½ onion, chopped
  • 8-10 baby carrots, chopped
  • 1 Tbsp olive oil
  • 2 Tbsp minced garlic
  • 2 Tbsp. parsley, dried or fresh
  • 2 cubes chicken bouillon
  • 8-10 cups water
Instructions
  1. In a large crockpot, drizzle the oil and add the chopped celery, onion, carrots, and garlic. Let simmer a bit until the veggies are warm and then add the chicken carcass, water, and parsley. Simmer on low for 10-12 hours. Strain. Stock can be used immediately or frozen.


Buffalo Chicken Dip


One of the current staples in our diet right now is this tangy Buffalo Chicken Dip.  I originally made it a little over three years ago after it was suggested to me as a use for shredded chicken on Facebook.  At the time, Mike wasn’t a fan.  He thought it was too spicy, so I didn’t make it again.

However, my friend Laura had the dip at her house several months ago when we were over for one of our dinner gatherings and Mike chowed down on the stuff.  I took that as my sign to make it again.  Apparently he only likes new foods if I am not the one to make them…  But that’s an entirely different issue.

Buffalo Chicken Dip
Author: 
Recipe type: Dip
Cuisine: American
Prep time: 
Cook time: 
Total time: 
Serves: 4-5
 
Ingredients
  • 1 lb. shredded chicken
  • ¾ cup Buffalo sauce (I use Frank's Red Hot)
  • ½ cup Ranch dressing
  • 1 cup shredded sharp cheddar cheese
  • 8 oz. cream cheese, softened
Instructions
  1. I pre-shred several pounds of chicken at one time by cooking a 5 lb. bag in a large crockpot and then giving it a spin in my Kitchen-Aide. I freeze in ½ pound baggies and just pull two out when I want to make this dip.
  2. In a small crockpot, place the chicken (if still frozen, let it thaw in the crockpot for a little while first before adding the other ingredients), Buffalo sauce, dressing, cheese, and cream cheese. Stir occasionally until heated through and well combined. Serve with chips and celery sticks.

Since then, I’ve made this dip at least once a month.  It’s great for lunch, delicious as a pre-dinner snack while the kiddos are eating their dinner (Mike and I usually eat after they are in bed), and best with lots of chips while watching Bears football.  This past Sunday, we watched football at the Kilmartin’s and enjoyed a variety of Buffalo Chicken dip inspired goodies.  My girls donned their new Bears attire, which proved to be good luck for da Bears as well!

Laura’s Easy Cheesy Potatoes


Since we moved to Oglesby a little over 3 years ago, I’ve been blessed to meet many people and make several friends in our little community.  One of my besties is Laura.  I first met her at lapsit (library story hour) when I would take Bo and she was with her son, Cade, who is just a bit younger than Bo.  She was one of those people that I knew instantly I could be friends with.

It took a little while — but eventually I took the leap and invited her and her littles to meet us at the park when my girls were still tiny babies.  Eventually, I started inviting them over to play and it spiraled from there.  Ultimately, I think I won her over when I took her dinner when her youngest daughter, Cara, was born.  My French silk pie is great for winning people over. 😉 Now it feels odd when we both have busy weeks and we don’t see each other because usually we see each other every couple of days — and text daily.

What I love most about Laura is that I never feel like she is judging me.  She’s totally Type-A (like me) but in a very laid-back way that makes it seem easy.  I can be myself — flaws and all – and it doesn’t seem to phase her.  She likes me just as much when I haven’t showered and I’m wearing my black yoga pants as she does when we’re able to escape out for dinner and shopping together and I actually wear grown-up clothes.  I don’t have to censor myself either — she already knows I’m crazy. 😉

We’ve been switching off hosting dinner for all of our brood every couple of weeks and I always leave Laura’s house with a new recipe I want to try to make myself.  She claims to not be a great cook, but her recipes are always perfect — family-friendly, relatively quick, and not a ton of ingredients.  Perfect for busy moms of three like us!

Laura's Easy Cheesy Potatoes
Author: 
Recipe type: Side
Cuisine: American
Prep time: 
Cook time: 
Total time: 
Serves: 12
 
Ingredients
  • 4 Tbsp. melted butter
  • 2 cups sharp cheddar cheese, shredded
  • 8 oz. sour cream
  • 1 can cream of chicken soup
  • 30 oz. frozen hash brown potatoes, thawed
Instructions
  1. Pull the hash browns out of the freeze and place in the sink or a large bowl to thaw for a few hours. Preheat oven to 350 and spray a 9x13 inch pan with PAM. In a large bowl, combine the hash browns, soup, sour cream, shredded cheese, and butter. Mix well. Spread the mixture into the prepared pan and bake for 1 hour. Great served with crockpot BBQ chicken or crockpot ham.

We had these cheesy potatoes the last time we ate at Laura’s and I texted her earlier this week for the recipe.  I made them on Monday and I’ve eaten a helping the last 5 lunches and dinners.  They are that good!  For some reason, my kids won’t eat them — but I think they are odd.  Only my kids would refuse to eat gooey, cheesy potatoes!